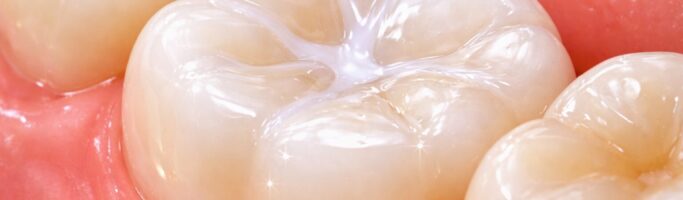
Fissure Sealants: A Simple Way to Protect Young Teeth

Fissure sealants for children are one of the most effective and gentle ways to protect young teeth from tooth decay. They are commonly recommended for children and teenagers as soon as their adult back teeth appear, helping to keep those teeth strong and healthy from an early age.

What are fissure sealants?

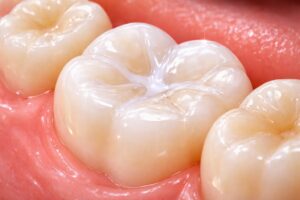
Fissure sealants are thin, tooth-coloured protective coatings applied to the biting surfaces of back teeth (molars and premolars). These teeth have natural grooves and pits where food and bacteria can easily collect. Even with good brushing, these areas can be difficult to clean properly.

Why are fissure sealants important for children?

Children’s back teeth are at a higher risk of decay because:

  • The grooves are deep and narrow

  • Brushing technique is still developing

  • These teeth do most of the chewing

Fissure sealants act as a barrier, sealing off these grooves and reducing the chance of cavities forming.

How do fissure sealants work?

Once applied, the sealant smooths the tooth surface so bacteria and food cannot get trapped. This:

  • Lowers the risk of tooth decay

  • Makes teeth easier to clean

  • Provides long-term protection during cavity-prone years

Is the procedure painful?

No. The process is completely painless and does not involve injections or drilling. Most children find it very quick and comfortable.

How are fissure sealants applied?

The procedure is simple and usually takes only a few minutes per tooth:

  1. The tooth is cleaned and dried

  2. A special gel prepares the surface

  3. The sealant is applied to the grooves

  4. A curing light hardens the sealant

Your child can eat and drink normally straight after.

What age should children get fissure sealants?

Sealants are most effective when placed soon after adult teeth erupt:

  • First adult molars: around ages 6–7

  • Second adult molars: around ages 11–13

How long do fissure sealants last?

Fissure sealants can last several years. They are checked at routine dental visits and can be topped up or replaced if needed.

Do fissure sealants replace brushing?

No. Fissure sealants for children are an extra level of protection. Brushing twice daily with fluoride toothpaste, regular dental check-ups, and a healthy diet are still essential for good oral health.

Are fissure sealants safe?

Yes. Fissure sealants are safe, well researched, and widely used in children’s dentistry to help prevent tooth decay.

Are fissure sealants only for young children?

No. Fissure sealants are also highly beneficial for teenagers, especially if their back teeth are healthy and free from decay.

Teenage years often come with:

  • Increased sugary snacks and drinks

  • Busy routines and missed brushing

  • Orthodontic treatment, which can make cleaning harder

If the teeth do not already have decay, fissure sealants can be used as a preventive treatment to protect molars during these higher-risk years. Applying sealants early helps reduce the chance of fillings being needed later on.

Fissure sealants for children and teenagers work best when teeth are still strong and intact, making them an excellent long-term investment in oral health.


Why Composite Bonding Stains ?

cosmetic bonding

Composite bonding is an excellent and cost-effective cosmetic solution for improving the shape, colour, and overall appearance of teeth. However, unlike natural enamel, composite material is more prone to staining over time. This is entirely normal and does not mean the treatment has failed.

Staining can develop gradually due to daily habits, the materials used, and how the bonding was finished and polished. Understanding why staining happens and where it occurs is key to choosing the proper treatment.

Most Common Reasons for Composite Bonding Staining

– Tea and coffee
– Smoking and vaping
– Certain foods such as curry, berries, red wine, and tomato-based sauces
– Mouthwashes such as Corsodyl

– Abrasiveness of toothpastes

– Natural ageing of the composite material
– Type of composite used
– Level of polish achieved after treatment

Types of Staining Explained

Surface (External) Staining

This is the most common type of staining and usually the easiest to manage. It sits on the surface of the composite or enamel and is often caused by diet or smoking. In many cases, professional cleaning, polishing, or targeted whitening can significantly improve the appearance.

Junction Staining (Tooth–Composite Edge)

This occurs at the border where the natural tooth meets the composite bonding. This area can be more vulnerable over time. Whitening may improve the natural tooth but not always the composite edge, and additional cosmetic treatment or re-bonding may be recommended.

Internal or Material-Based Staining

This type of staining occurs within the composite material itself. It may be related to the ageing of the material, absorbed pigments, or the original shade used. Internal staining cannot usually be corrected with whitening alone, and replacement of the composite may be required.

Can Teeth Whitening Fix Stained Composite Bonding?

Teeth whitening only works on natural tooth enamel and does not change the colour of composite bonding. However, whitening can still be helpful as part of a treatment plan by improving the surrounding teeth and allowing the bonding to be reviewed and adjusted if needed. It can also help remove some of the superficial staining trapped in difficult-to-access areas where polishing might not be possible.

Treatment Options Based on Staining Location

Depending on the assessment, treatment options may include professional cleaning and polishing, teeth whitening, targeted cosmetic treatments, or refreshing or replacing composite bonding. The most suitable choice depends on the cause, depth, and location of the staining.

Why a Consultation Is Important

A consultation allows us to assess the staining properly and explain what improvements can realistically be achieved. This includes evaluating the source of the staining, the condition of the composite, and its interaction with the natural tooth.

Final Thoughts

Staining of composite bonding is common and often manageable. With proper assessment and treatment, many patients can achieve a fresher, brighter, and more even smile.

How Acid Reflux Damages Your Smile and What You Can Do About It

acid reflux and enamel erosion

Acid Reflux and Tooth Erosion: Understanding the Risks and Protecting Your Smile

If you’re living with GERD and tooth erosion, you may already know how uncomfortable acid reflux can be — but many patients don’t realise the significant impact it can have on their teeth and oral health. Stomach acid is powerful, and repeated exposure can slowly wear down enamel, leading to sensitivity, cavities, and long-term damage if not appropriately managed.

This detailed guide explains how GERD affects your mouth, the symptoms to look out for, which teeth are most at risk, and the steps a dentist would recommend to protect your smile.

What Is GERD?

Gastro-oesophageal reflux disease (GERD) happens when stomach acid frequently flows back into the oesophagus. Over time, this acid can reach the throat and mouth, exposing your teeth to erosive damage.

How GERD/Acid Reflux Affects Your Teeth

Stomach acid has a pH of around 1–2, strong enough to dissolve enamel. When acid repeatedly enters the mouth, the enamel weakens, becomes thinner, and loses its natural protection.

Dental Problems Linked to GERD

  • Tooth erosion – enamel becomes smooth, shiny, and worn

  • Increased sensitivity – especially to cold or sweet foods

  • Yellowing of teeth – due to thinning enamel

  • Higher risk of cavities – weakened enamel is more vulnerable

  • Cracking or chipping – from loss of tooth structure

  • Bad breath – caused by acid and dry mouth

  • Gum irritation – reflux can aggravate inflamed gums

Which Teeth Are Usually Affected the Most?

Because refluxed acid tends to enter the mouth and pool around certain areas, some teeth are more exposed than others:

  • Upper back teeth (molars and premolars):
    These are commonly the first to show signs of erosion, especially on the palatal (inner) surfaces, where acid often accumulates.

  • Upper front teeth:
    The inside surfaces can become smooth, thin, glassy, and sensitive as enamel gradually dissolves.

  • Lower back teeth:
    Although partially shielded by the tongue, they can still show erosion in longstanding or severe GERD.

  • Teeth affected during nighttime reflux:
    Reflux during sleep causes more severe wear because saliva flow drops and acid stays in contact with the teeth for much longer.

Recognising these patterns helps your dentist diagnose GERD-related erosion early.

Symptoms You May Notice

Many patients notice dental signs before they realise reflux is the cause. Common symptoms include:

  • Sharp sensitivity when drinking cold water

  • A sour or acidic taste in the mouth

  • Worn, flattened, or smooth tooth surfaces

  • Yellowing of the teeth

  • Frequent cavities despite good hygiene

  • Hoarseness, coughing, or throat burning

  • “Morning taste” or dryness after sleeping

What Your Dentist May Recommend

1. Minimise Acid Exposure

  • Rinse with water or fluoride mouthwash after a reflux episode.

  • Avoid brushing for at least 30 minutes afterwards.

  • Use high-fluoride toothpaste to strengthen enamel.

  • Chew sugar-free gum to stimulate saliva.

2. Professional Preventive Care

  • Fluoride varnish to strengthen weakened enamel.

  • Prescription-strength fluoride toothpaste for home use

  • Regular monitoring of erosion patterns

3. Restorative Options

If erosion is moderate or advanced, your dentist may recommend:

  • Composite bonding to rebuild an enamel-like structure

  • Onlays or crowns for heavily worn teeth

  • A protective nightguard, especially if symptoms worsen during sleep

4. Collaborating With Your GP

Medical management is essential. Your GP may advise:

  • Acid-suppressing medication

  • Adjusting meal timings

  • Weight management

  • Sleeping with your head elevated

Lifestyle Tips to Reduce Acid Reflux

  • Avoid acidic and carbonated drinks.

  • Reduce caffeine, alcohol, and spicy foods.

  • Eat smaller meals and avoid lying down afterwards.

  • Maintain a healthy weight.

  • Drink water regularly throughout the day.

When to Seek Dental Advice

Book a dental review if you notice:

  • Sudden or worsening sensitivity

  • Changes in tooth shape or colour

  • A persistent acidic taste

  • Wear on the inner surfaces of upper teeth.

Early dental intervention can prevent long-term damage and protect your smile.

Final Thoughts

GERD doesn’t just affect your stomach — it can significantly weaken and erode your teeth if left unmanaged. By recognising the signs of GERD and tooth erosion, following dental guidance, and working with your GP  and a dentist to control reflux, you can protect your enamel and maintain a healthy, comfortable smile.


Metallic taste in the mouth

metallic taste in the mouth

If you’ve suddenly noticed a metallic taste in the mouth, you’re not alone—and it’s more common than you might think. That strange taste, often described as similar to sucking on coins or having blood in your mouth, can have a few different causes. Some are minor and temporary, while others may be worth getting checked out.

Let’s break down what might be behind it, and what you can do next.

Possible Dental Reasons

Sometimes the answer is right inside your mouth:

  • Gum problems: If your gums are inflamed or bleeding (from gingivitis or periodontitis), it can leave behind a metallic or bloody taste.

  • Tooth infections: A dental abscess or other infection can alter the way things taste, especially if there’s pus or swelling.

  • Poor oral hygiene: If plaque and bacteria build up, it can leave behind unpleasant tastes (and smells).

  • Metal fillings or crowns: Dental work that contains metal—especially if it’s old—might cause a taste, particularly if it’s breaking down or reacting with other materials.

Medical Conditions That Can Affect Taste

A metallic taste isn’t always linked to your teeth. It could also be caused by:

  • Vitamin or mineral deficiencies, especially zinc or B12

  • Side effects from medication like antibiotics, antihistamines, or certain blood pressure tablets

  • Pregnancy, especially in the first trimester, hormonal changes can mess with your taste buds.

  • Sinus infections or colds that block your sense of smell and taste

  • Neurological issues, though this is less common

  • Chronic conditions like kidney or liver problems can sometimes cause strange tastes in the mouth, too.

Other Triggers to Think About

  • Smoking or vaping

  • Radiation or chemotherapy treatment

  • Exposure to heavy metals (e.g., lead or mercury)

  • Dry mouth (xerostomia), especially if you’re dehydrated or on certain meds

What You Can Do About It

If the metallic taste is mild and only lasts a day or two, it might not be anything serious. But if it keeps happening, here are a few steps you can take:

  • Book a dental check-up: This is the best place to start. Your dentist can look for infections, gum issues, or problems with old dental work.

  • Review your medications: If the taste started after a new prescription, talk to your GP or pharmacist.

  • Improve your oral hygiene: Brush twice a day, floss daily, and clean your tongue. A mouthwash might help too.

  • Stay hydrated: Drinking water and chewing sugar-free gum can help flush out any bad taste.

  • Talk to your doctor: If you’ve ruled out dental causes and the taste is still there, your GP might check for vitamin deficiencies or other health issues.

When Should You Worry?

If the metallic taste in the mouth sticks around for more than a week, or comes with other symptoms like fatigue, weight changes, or a sore mouth, don’t wait—get it checked. Most causes are easy to manage, but it’s better to catch any underlying problems early.

Final Thoughts

A metallic taste in the mouth can be annoying, but it’s often just your body’s way of telling you something’s off. Whether it’s a dental issue, a reaction to medication, or something else entirely, a quick chat with your dentist or doctor can usually get to the bottom of it.

How to Prepare for Your First Appointment: Practical Tips for Nervous Dental Patients

I’m Dr. Agnieszka Milbauer from Your Perfect Smile Dental & Implant Clinic, and if you’ve just taken that brave first step of contacting us, well done. That moment of reaching out often takes more courage than the appointment itself.

Now let’s talk about the next step: preparing for your visit in a way that feels safe, calm, and manageable.

 Choose the Time of Day That Feels Best for You

Some people prefer to book their appointment first thing in the morning, so they don’t spend the whole day worrying about it.  Some, feel more comfortable coming in later, once they’ve had time to wake up, relax, or speak to someone about how they’re feeling.

There’s no right or wrong when making this first step. When you contact us, please let us know what would make the day easier for you—we’ll do our best to accommodate that.

Bring Something to Distract and Comfort You

Many of my patients find it helpful to bring:

  • Headphones and a calming playlist or audiobook 

  • A podcast you enjoy

  • A familiar object—even something small to hold in your hand

You’re welcome to keep your headphones in during the appointment, and I’ll always let you know what’s happening gently and slowly.

 You Don’t Have to Come Alone

If you feel safer with someone by your side, please feel free to bring a friend or family member to your appointment. Having a supportive person nearby—especially one who understands your fear—can make all the difference.

Some patients even plan a coffee or walk afterwards with their companion, which gives them something positive to look forward to.

 Try Relaxation Techniques That Work for You

Every patient is different. Here are a few things that have worked for others before a first appointment:

  • Deep breathing or guided relaxation apps

  • Yoga or light stretching to release tension

  • Self-hypnosis or calming visualisation techniques

  • A warm bath the night before

  • Journaling to release fear or talk through your thoughts

You don’t need to “fix” the fear—just soothe it enough to take one small step forward.

 In Some Cases, Ask Your GP About a One-Off Relaxant

For patients with extreme dental phobia, it’s sometimes appropriate to speak with your GP about a mild, short-term prescription (like a one-off sedative) to take just before your appointment. This is particularly helpful if your fear is deeply rooted or linked to past trauma.

 After the Appointment, Most Patients Say the Same Thing…

Time and time again, I hear:

“I can’t believe I waited so long. That wasn’t nearly as bad as I thought.”

The longer you avoid coming, the bigger the fear becomes in your mind. But once you come in—even just for a chat—you’ll often find it’s softer, calmer, and far more manageable than you imagined.

If you’re preparing for your first appointment, I hope this gives you some reassurance. You don’t have to be fearless—you just need to take one small step.

Warmly,
Dr. Agnieszka Milbauer
Your Perfect Smile Dental & Implant Clinic

Nervous About Seeing the Dentist? A Gentle Step-by-Step Guide

Hello, I’m Dr. Agnieszka Milbauer, one of the dentists at Your Perfect Smile Dental & Implant Clinic. If you’re reading this, chances are you’ve been putting off a dental visit—not because you don’t care, but because you’re afraid.

And I want you to know that fear is completely normal.

Many people I see have gone years—sometimes decades—without a dental check-up or dental hygiene appointments. The reasons vary: bad childhood memories, embarrassment, fear of pain, noise or simply being overwhelmed. Whatever your reason, you’re not alone. And I’m here to help you find your way back to a healthier, more confident smile.


 Step 1: It’s Okay to Be Nervous

Dental anxiety is more common than you realise. Recognising that fear is the first brave step toward overcoming it.

Maybe you’re worried about what I might say or what we might find. Please let me reassure you:

At our Clinic, we never judge.
We welcome you with understanding, kindness, and patience—no matter how long it’s been. It is also not uncommon that in reality is nowhere near “as bad as you may think”

 Step 2: Take That First Step—In Your Own Way

Even sending a simple message can be a breakthrough moment. You don’t need to book an appointment immediately. Start by:

  • Sending us an email or a message through our contact form

  • Calling to have a friendly, no-pressure chat

  • Letting us know you’re anxious, so we can guide you through the process

Often, patients tell me that just speaking to someone who listens helped reduce their anxiety straight away.

 Step 3: Come In for a Calm, No-Pressure Visit

When you’re ready, we can book a consultation where nothing will be done unless you say so.

You can come in, meet me or one of our team, and just have a chat. See the Clinic. Ask questions. Get to know the environment—on your terms. This visit is all about building trust and helping you feel safe. If you still too hesitant to see me and sit on a dental chair just come in to talk to one of our team. Have a sit down in a patient lounge and explain what is it you need to make that experience better.

 Step 4: Together, We’ll Build a Care Plan That Respects Your Pace

Your comfort always comes first. That means:

  • Longer, quieter appointments if you need them

  • A calming environment

  • A simple hand signal to pause at any point

  • A transparent plan you fully understand and agree with

Every step will be guided by your needs and your pace.

 Step 5: Reclaiming Your Oral Health

Many people delay care until problems become painful or irreversible.

But starting now can help prevent more serious issues down the line, and you’ll be surprised how empowering that can feel. Often, just making the first appointment lifts a huge weight.

 When You’re Ready

Your oral health is important, but so is your peace of mind. At Your Perfect Smile Dental & Implant Clinic, you’ll never be rushed or judged. Only supported.

📞 Call us
📧 Send an email
💬 Use our contact form

Let us know you’re feeling anxious—and we will make sure you’re taken care of from the very first step.

Warm regards,
Dr. Agnieszka Milbauer
Your Perfect Smile Dental & Implant Clinic

Pola Aligners 10%: The Perfect Whitening Gel for Aligners & Retainers

Whiten Your Smile Without Damaging Your Aligners or Retainers

If you wear orthodontic aligners or retainers, you know how tricky it can be to whiten your teeth without compromising your trays. Traditional whitening gels can cause fogging, damage, or uneven whitening, making your aligners look cloudy and unappealing. That’s where Pola Aligners 10% by SDI comes in.

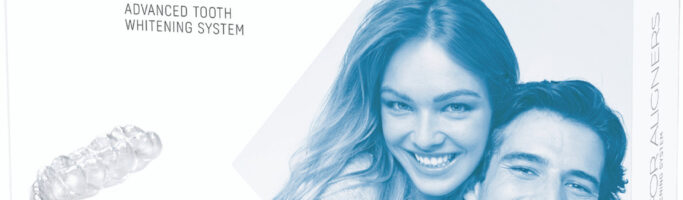
Pola Aligners 10% is a professional-grade whitening gel specifically formulated for use with clear aligners and retainers. Unlike standard whitening products, this unique formula ensures effective whitening while keeping your trays crystal clear. With a gentle 10% carbamide peroxide formula, it delivers noticeable results without sensitivity, making it an excellent choice for daily aligner users who want a brighter smile.

Why Choose Pola Aligners 10%?

Using the right product is crucial when whitening your teeth with aligners or retainers. Pola Aligners 10% stands out for several reasons:

Safe for Aligners & Retainers

Unlike many whitening gels that can fog or degrade plastic trays, Pola Aligners 10% is specifically designed to be compatible with all clear aligners and retainers. The formula won’t damage, warp, or discolour your trays, keeping them invisible while effectively whitening your teeth.

Optimized 10% Carbamide Peroxide Formula

The carefully balanced 10% carbamide peroxide formula ensures safe yet powerful whitening. It gradually breaks down surface stains and penetrates the enamel for deeper whitening results,  while being gentle on your teeth and gums.

Works While You Wear Your Aligners

No extra steps needed! Simply apply the gel inside your aligners or retainers and let it work while you go about your day or sleep at night. The gel stays in place, allowing for consistent and even whitening without the hassle of additional trays or strips.

How to Use Pola Aligners 10%

Using Pola Aligners 10% is simple and fits seamlessly into your aligner-wearing routine:

  1. Start with clean aligners or retainers – Rinse and dry your trays before application.
  2. Apply a small amount of gel – Place a thin, even layer inside the trays. A little goes a long way!
  3. Wear as directed – Typically, you can wear it for a few hours or overnight for best results.
  4. Rinse and clean after use – Remove your aligners, rinse your mouth, and gently clean your trays before putting them back in.
  5. Enjoy a whiter smile! – Regular use will gradually brighten your teeth without any damage to your aligners.

Who Should Use Pola Aligners 10%?

  • Clear aligner users looking for a safe and effective way to whiten teeth.
  • Retainer wearers who want to maintain their straight smile while keeping their teeth bright.
  • Anyone concerned about fogging or damaging their aligners with traditional whitening products.
  • People with sensitive teeth who need a gentler whitening solution.

What Makes Pola Aligners 10% Different?

Many whitening gels contain harsh chemicals that can degrade plastic aligners, making them appear cloudy, brittle, or even weakened. Some gels are also too thick or sticky, leaving residue that is difficult to remove. Pola Aligners 10% was formulated specifically with aligners and retainers in mind, ensuring:

No clouding or fogging – Aligners stay perfectly clear.
No warping or weakening – Trays remain structurally sound.
Even whitening – Gel stays in place for consistent results.
Comfortable wear – No irritation, no messy residue.

Brighten Your Smile with Confidence!

Your orthodontic journey shouldn’t stop you from achieving a dazzling smile. With Pola Aligners 10% by SDI, you get a safe, professional-strength whitening solution tailored for aligner and retainer users. No damage, no fogging—just beautifully white teeth.

Burning Mouth Syndrome: Symptoms, Causes, Common Conditions, and Effective Remedies

Burning Mouth Syndrome (BMS) is a chronic condition characterized by a persistent burning or scalding sensation in the mouth. Despite the lack of visible signs of irritation, BMS can significantly disrupt daily life, making activities like eating, drinking, and speaking uncomfortable. This guide explores its symptoms, causes, who is most affected, and how it can be managed effectively.

Who Typically Experiences Burning Mouth Syndrome?

While BMS can affect anyone, certain groups are more commonly affected:

  1. Postmenopausal Women:
    • Hormonal changes, particularly reduced estrogen levels, are a significant factor.
    • Women are up to seven times more likely to develop BMS than men.
  2. Middle-Aged and Older Adults:
    • BMS is most frequently seen in individuals over 50.
    • Aging is associated with changes in nerve sensitivity and saliva production.
  3. People with Underlying Conditions:
    • Those with diabetes, autoimmune disorders, or nutritional deficiencies are at increased risk.
  4. Individuals Experiencing High Stress or Anxiety:
    • Chronic stress and emotional distress are linked to burning sensations and heightened pain perception.
  5. People Taking Certain Medications:
    • Long-term use of medications like antihistamines, ACE inhibitors, or antidepressants can contribute to dry mouth and BMS symptoms.

Symptoms Commonly Reported by Patients

Patients often describe BMS symptoms as unusual, distressing, or difficult to explain. Common descriptions include:

  1. Burning or Scalding Sensation:
    • A feeling of heat or rawness, often compared to drinking hot liquids or eating spicy foods.
    • Common locations include the tongue, roof of the mouth, lips, and gums.
  2. Dry Mouth:
    • Patients frequently complain of dryness or stickiness in the mouth, despite adequate hydration.
    • This can be accompanied by excessive thirst or difficulty swallowing.
  3. Altered Taste:
    • A metallic, bitter, or sour taste is commonly reported.
    • Some patients also experience a loss of taste or heightened sensitivity to certain foods.
  4. Irritation and Sensitivity:
    • Foods that are spicy, salty, or acidic often aggravate symptoms.
    • Sensitivity to alcohol-based mouthwashes or certain toothpastes is also common.
  5. Pain Fluctuation:
    • Symptoms may worsen as the day progresses, peaking in the evening.
    • Many patients find relief during the night or when distracted by other activities.
  6. Emotional Impact:
    • BMS is often associated with frustration, stress, or even depression due to the chronic nature of the symptoms and difficulty finding relief.

Most Common Locations for Burning Sensations

BMS typically affects specific areas of the mouth:

  • Tongue: The front two-thirds of the tongue (tip and sides) are most commonly involved.
  • Roof of the Mouth (Palate): A raw or burning feeling is often described here.
  • Lips: Patients may report tingling, heat, or a constant burning sensation on the lips.
  • Gums and Inner Cheeks: While less frequent, the burning can extend to these areas.

Causes of Burning Mouth Syndrome

BMS can be classified as primary (with no identifiable cause) or secondary (resulting from an underlying condition). Common causes include:

Primary Burning Mouth Syndrome

  • No identifiable medical or dental cause.
  • Believed to be related to nerve dysfunction affecting pain and taste sensations.

Secondary Burning Mouth Syndrome

  1. Hormonal Changes:
    • Common in postmenopausal women due to estrogen decline, affecting saliva production and oral tissue sensitivity.
  2. Nutritional Deficiencies:
    • Deficiencies in Vitamin B12, iron, folate, and zinc disrupt nerve function and oral tissue health.
  3. Dry Mouth (Xerostomia):
    • Often caused by medications, dehydration, or systemic conditions like diabetes or Sjögren’s syndrome.
  4. Medications:
    • Long-term use of antidepressants, antihistamines, or ACE inhibitors can lead to dry mouth or nerve dysfunction, triggering BMS.
  5. Oral Infections:
    • Fungal infections like oral thrush (Candida) can cause burning, redness, and soreness in the mouth.
  6. Psychological Factors:
    • Chronic stress, anxiety, or depression may intensify symptoms by increasing pain sensitivity.
  7. Gastroesophageal Reflux Disease (GERD):
    • Acid reflux can irritate oral tissues, particularly the back of the throat and tongue, causing burning sensations.
  8. Allergic Reactions:
    • Reactions to dental materials, oral care products, or certain foods can trigger burning sensations.
  9. Systemic Diseases:
    • Conditions like hypothyroidism, Parkinson’s disease, and multiple sclerosis can impair nerve function and contribute to BMS.

Common Dental Conditions Associated with Burning Symptoms

In addition to systemic causes, several oral health conditions can present with burning sensations, including:

  1. Lichen Planus:
    • A chronic inflammatory condition causing white, lace-like patches, redness, and painful sores in the mouth.
  2. Geographic Tongue:
    • A benign condition where the tongue develops smooth, red patches bordered by white areas.
    • Patients often report burning or sensitivity, especially when consuming spicy or acidic foods.
  3. Oral Thrush (Candidiasis):
    • A fungal infection marked by creamy white patches and redness on the tongue or inner cheeks.
    • Burning sensations are a common symptom, particularly in severe cases.
  4. Allergic Stomatitis:
    • An allergic reaction to dental materials, mouthwash, or toothpaste.
    • Symptoms include redness, swelling, and burning sensations.
  5. Traumatic Ulcers or Irritations:
    • Caused by sharp teeth, poorly fitting dentures, or excessive tongue biting.
  6. Glossitis:
    • Inflammation of the tongue due to infections, irritants, or deficiencies, often presenting with burning and tenderness.

Remedies for Burning Mouth Syndrome

There’s no universal cure for BMS, but several strategies can help manage symptoms:

1. Lifestyle Changes

  • Avoid spicy, acidic, or hot foods and beverages.
  • Quit smoking and limit alcohol consumption.
  • Stay hydrated by sipping water throughout the day.

2. Nutritional Support

  • Address deficiencies with supplements like Vitamin B12, iron, zinc, and folate.
  • Include nutrient-rich foods like leafy greens, whole grains, and lean proteins.

3. Stress Management

  • Practice stress-reducing techniques like yoga, mindfulness, or deep breathing.
  • Cognitive Behavioral Therapy (CBT) can help manage chronic symptoms and emotional impacts.

4. Oral Care Modifications

  • Use alcohol-free mouthwashes and mild, non-abrasive toothpaste.
  • Avoid harsh dental products that may irritate sensitive tissues.

5. Medical and Professional Treatments

  • Topical Treatments: Capsaicin rinses or lidocaine gels for localized pain relief.
  • Prescription Medications: Antidepressants, anticonvulsants, or hormone replacement therapy may be recommended for severe cases.
  • Professional Care: Dentists can address issues like poorly fitting dentures or underlying infections.

Conclusion

Burning Mouth Syndrome affects a diverse group of people but is most common in postmenopausal women and older adults. Patients often describe symptoms such as a burning tongue, dry mouth, and taste changes. BMS can arise from various causes, including hormonal changes, nutritional deficiencies, and associated dental conditions like geographic tongue or lichen planus. By understanding the symptoms, exploring causes, and following effective remedies, you can take control of this condition and improve your oral health. If you experience persistent symptoms, seek professional guidance for a personalized treatment plan.

How to Clean and Maintain Orthodontic Retainers

Proper cleaning and maintenance of orthodontic removable retainers is crucial for keeping them hygienic, odour-free, and functional. Neglecting care can lead to bacterial buildup, staining, and even retainer damage. In this guide, we’ll walk you through the best practices for cleaning your retainers, the dos and don’ts of maintenance, and how to choose the right cleaning products.

Why Cleaning Your Orthodontic Retainers is Essential

Removable retainers are in constant contact with your teeth, gums, and saliva. Over time, they can gather:

  • Bacteria that cause bad breath or infections.
  • Plaque and tartar buildup, similar to what forms on your teeth.
  • Staining from food, drinks, or poor cleaning routines.

Regular cleaning helps maintain oral hygiene, prevents unpleasant odours, and extends the life of your retainers.

How to Clean Your Orthodontic Retainers

Daily Cleaning Routine

To keep your retainers in top shape:

  1. Rinse Immediately: After removing your retainers, rinse them with lukewarm water to wash away saliva and debris.
  2. Brush Gently: Use a soft-bristled toothbrush (different from the one you use on your teeth) to gently clean the surface of your retainers. Use mix lukewarm water with a drop of mild dish soap. Avoid using abrasive toothpaste, as it can scratch them.
  3. Store Properly: When not in use, store your retainers in their protective case. Ensure they are dry before placing them inside to avoid bacterial growth.
Deep Cleaning (Once or Twice a Week)

Deep cleaning ensures any stubborn buildup is removed:

  1. Use Retainer Cleaning Tablets: Dissolve a cleaning tablet in a glass of water and soak your retainers as directed (usually 15-20 minutes). These solutions are effective at removing stains and bacteria.
  2. Use ultrasonic baths . Available from online retailers like Amazon.

Important: Always rinse your retainers thoroughly with lukewarm water after using any cleaning product to avoid residue or irritation.

Best Products for Cleaning Retainers

Safe to Use:

    • Retainer cleaning tablets (e.g., Retainer Brite, ).
    • Mild dish soap.
    • Non-abrasive toothpaste


Avoid These Products:

      • Whitening toothpaste (contains abrasive particles that scratch retainers).
      • Harsh chemicals like bleach or vinegar, which can damage retainers over time.
      • Hot or boiling water, as heat can warp the retainers.
      • Mouthwash with alcohol, which can dry out the material.

Dos and Don’ts of Retainer Maintenance

Do:

  • Clean your retainers daily to prevent bacteria buildup.
  • Store your retainers in a hard protective case when not in use.
  • Keep retainers away from pets—many are drawn to chewing on them!
  • Visit your orthodontist regularly to ensure your retainers fit correctly and are in good condition.

Don’t:

  • Wear retainers while eating,
  • Use toothpaste or abrasive cleaners for deep cleaning.
  • Leave your retainers in pockets, bags, or any unprotected area where they can be crushed or lost.
  • Soak your retainers in sugary drinks like soda or juice, which can cause staining.

Additional Tips for Retainer Care

  1. Replace When Necessary: Retainers don’t last forever. If you notice cracks, significant discoloration, or improper fit, consult your orthodontist for a replacement.
  2. Use Lukewarm Water Only: Hot water can warp plastic retainers, making them unusable.
  3. Keep a Backup Retainer: If possible, have a spare set of retainers made. Accidents happen, and having a backup ensures your orthodontic progress isn’t disrupted.
  4. Travel Safely: When traveling, always carry your retainers in their case and keep a small cleaning kit handy, including a travel-sized toothbrush and mild soap.

When to Contact Your Orthodontist

You should contact your orthodontist if:

  • Your retainers are cracked, warped, or no longer fit properly.
  • You notice persistent odors or discoloration despite regular cleaning.
  • You lose your retainers and need replacements to maintain your smile.

Maintaining Your Smile

Cleaning and maintaining your orthodontic removable retainers is a simple but essential step in protecting your investment in orthodontic treatment. By following these care tips and choosing the right cleaning products, you can ensure your retainers stay hygienic, odor-free, and in excellent condition. With proper care, your retainers will help preserve your beautiful smile for years to come!

Digital Scanners in Dentistry: Transforming Oral Care with Precision and Comfort

Traditional dental impressions can be messy, uncomfortable, and time-consuming, leaving many patients dreading the process. However, advancements in dental technology are changing the game. Digital scanners in dentistry have revolutionized how dentists capture impressions, offering unparalleled accuracy and convenience. Let’s explore how this technology benefits both, patients and dentists, from improving comfort to delivering superior results.


What Are Digital Scanners in Dentistry?

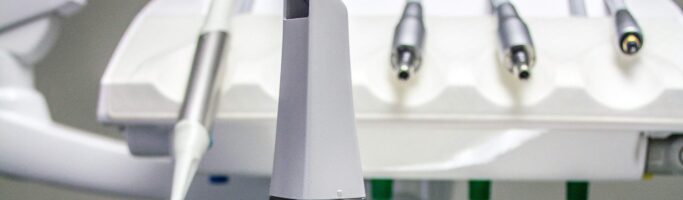
Digital scanners are high-tech devices that create detailed 3D images of a patient’s teeth and gums. Using a handheld wand, dentists scan the inside of your mouth, capturing every contour and surface digitally. This eliminates the need for traditional impression materials like alginate or silicone, making the process faster, cleaner, and more precise.


Advantages for Patients

  1. Enhanced Comfort
    Traditional impressions involve biting into a tray filled with gooey material, which can be uncomfortable or even trigger a gag reflex. Digital scanners completely remove this discomfort by using a small, non-invasive wand to capture the scan.
  2. Speed and Convenience
    A digital scan takes only a few minutes, and there’s no waiting for moulds to set or shipping them to a laboratory. The process is seamless and reduces overall chair time.
  3. Improved Accuracy
    Digital scanners provide highly accurate 3D images, reducing the risk of errors in the impressions. This means fewer adjustments, better-fitting crowns, aligners, and dentures, and faster treatment timelines.
  4. Visual Engagement
    Many digital scanners allow dentists to display the 3D images on a screen in real-time. Patients can see their teeth up close and better understand their oral health, making consultations more engaging and informative.
  5. Faster Turnaround Times
    With digital impressions, dentists can send files directly to labs or even 3D print restorations in-house. This results in quicker delivery of crowns, bridges, or aligners, saving patients from lengthy waiting periods.
  6. Eco-Friendly Solution
    By eliminating disposable impression trays and materials, digital scanning is a greener option that reduces waste.

Advantages for Dentists

  1. Unmatched Precision
    Digital scanners capture intricate details that traditional impressions might miss, ensuring accurate restorations and reducing the need for remakes or adjustments.
  2. Streamlined Workflow
    Digital impressions integrate seamlessly with other dental technologies like CAD/CAM systems and 3D printers. Dentists can design and produce restorations with minimal delays, improving efficiency.
  3. Improved Communication with Laboratories
    Digital files can be shared instantly with dental labs, eliminating the risk of distortions or errors caused by physical molds. This enhances collaboration and speeds up the production process.
  4. Better Patient Relationships
    Using digital scanners shows patients that the practice is modern and invested in providing the best possible care. Real-time visuals also help in explaining treatment plans, building trust and understanding.
  5. Reduced Mess and Hassle
    No more mixing impression materials or dealing with trays. Digital scanning is clean, straightforward, and hassle-free.
  6. Time-Saving for Complex Cases
    For cases involving multiple restorations or orthodontic aligners, digital scanners save significant time by delivering precise measurements instantly.

Why Accuracy Matters

  1. Perfect Fit Restorations
    Accurate impressions ensure that crowns, bridges, and aligners fit perfectly the first time. This reduces the need for follow-up visits or adjustments, saving time and money for both dentists and patients.
  2. Improved Orthodontic Outcomes
    For treatments like Invisalign or braces, precision in impressions ensures that aligners or brackets are placed correctly, leading to better results.
  3. Early Problem Detection
    The detailed 3D images captured by scanners can reveal issues that might go unnoticed during a visual examination, such as tiny cracks or irregularities in tooth surfaces.
  4. Predictable Results
    Digital impressions offer a reliable foundation for treatment planning, minimizing surprises and ensuring predictable, high-quality outcomes.

How Digital Scanning Works

  1. Scanning:
    The dentist uses a handheld wand to scan your teeth and gums. This process is quick and painless, with no need for messy trays.
  2. Image Creation:
    The scanner generates a 3D digital model of your mouth in real-time, which appears on a screen for both you and your dentist to review.
  3. Analysis and Planning:
    The dentist uses the 3D model to diagnose issues, design restorations, or plan orthodontic treatments with unparalleled precision.
  4. Delivery:
    The digital file is either sent to a lab or used in-house with a CAD/CAM system to create the final restoration or appliance.

Common Dental Procedures Using Digital Scanners

  • Crowns and Bridges: Faster, better-fitting restorations.
  • Orthodontics: Precision aligners like Invisalign.
  • Implants: Accurate planning for implant placement.
  • Dentures: Improved fit and comfort.
  • Smile Makeovers: Predictable results with veneers and cosmetic treatments.

Conclusion

Digital scanners in dentistry are reshaping the patient experience by making treatments faster, more accurate, and significantly more comfortable. For dentists, they streamline workflows, enhance precision, and improve patient relationships. Whether you need a crown, aligners, or a complete smile makeover, digital scanning technology ensures that you’ll get the best results possible.

At Your Perfect Smile Dental & Implant Clinic, we’re proud to offer cutting-edge technologies like digital scanners to ensure you receive exceptional care. Experience the future of dentistry—schedule your consultation today!